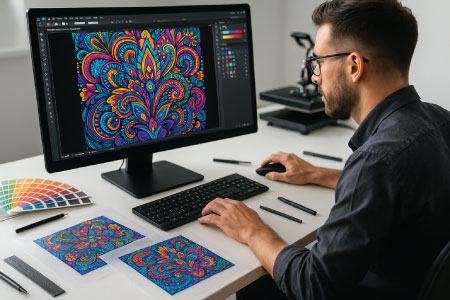
Why DTF Transfers Are Perfect for Complex Designs
In the apparel printing industry, creating detailed, vibrant, and long-lasting designs is the ultimate goal for many designers and print shop owners. With Direct to Film (DTF) transfers, complex designs that were once a nightmare to print can now be executed flawlessly. DTF printing technology has made it possible to produce sharp lines, rich colors, and intricate details on almost any type of fabric—whether cotton, polyester, blends, or specialty garments.
This guide will take you step-by-step through the process of creating complex designs using DTF transfers, from initial concept to the final pressed garment. Whether you’re a small business owner, a custom apparel shop, or a hobbyist looking to level up your skills, this detailed tutorial will help you achieve professional-grade results every time.
What Makes DTF Transfers Ideal for Complex Designs?
- High Resolution & Fine Detail
DTF technology supports resolutions up to 1200 dpi, meaning you can achieve ultra-fine lines, intricate patterns, and tiny text that remain sharp and readable after transfer. - Vibrant Full-Color Printing
Unlike screen printing, which requires multiple screens for each color, DTF prints full-color images in a single pass. Gradient blends, color transitions, and photographic details are possible without extra setup. - Versatility on Fabric Types
DTF transfers work on a wide variety of fabrics—light, dark, textured, or smooth—without the limitations of sublimation or heat transfer vinyl (HTV). - Durability & Wash Resistance
High-quality DTF transfers can withstand 50+ washes without significant fading or cracking, making them ideal for complex designs that need to maintain their integrity.
Concept & Inspiration for Complex Designs
The creation process begins with a solid concept. This is especially important for complex designs that have many elements, layers, or colors.
Tips for Brainstorming Complex Designs:
- Think of storytelling—designs that tell a visual story naturally have more detail.
- Incorporate textures, gradients, and layering to make your design visually rich.
- Take inspiration from nature, architecture, cultural art, or digital illustrations.
Example Ideas:
- Vintage floral illustrations with layered textures
- Mandala or geometric patterns with metallic accents
- Realistic animal portraits with lifelike fur and eyes
- Pop-art inspired retro graphics with bold, overlapping shapes
Choosing the Right Design Software
For high-quality DTF printing, your digital file must be prepared correctly. Popular design tools include:
- Adobe Illustrator – Best for vector-based complex designs that require scalability.
- Adobe Photoshop – Great for photo-realistic designs and raster-based artwork.
- CorelDRAW – Industry-favorite for apparel print shops.
- Affinity Designer – Budget-friendly alternative to Illustrator.
When designing for DTF, always work in RGB color mode to take advantage of the full color spectrum that DTF printers can reproduce.
Setting Up Your Canvas for DTF Transfers
Your design setup affects print quality dramatically.
Optimal DTF Setup Settings:
- Resolution: 300 dpi minimum
- Color Mode: RGB
- Background: Transparent (especially for irregular shapes or designs without a solid background)
- Bleed Margin: Add 0.125” (3mm) bleed for edge-to-edge printing
- File Format: PNG (preferred), TIFF (optional), or PSD for layered editing
Designing with Layer Depth and Detail
When creating complex designs for DTF transfers:
- Use Multiple Layers – Keep background, midground, and foreground elements on separate layers for better control.
- Incorporate Gradients & Shading – Smooth color transitions enhance realism.
- Balance Color Contrast – Ensure readability from a distance while retaining detail up close.
- Zoom In to Check Details – Work at 200–400% zoom to ensure small elements are crisp.
Preparing Artwork for Printing
Before sending to print:
- Outline Text (convert to curves) to avoid missing fonts.
- Flatten Layers if your RIP software requires it.
- Ensure Transparency is Maintained in PNG format.
- Check Color Accuracy using soft-proofing tools in your software.
Printing DTF Transfers for Complex Designs
Printer Requirements:
- DTF printer with high-resolution printhead (Epson i3200 or similar)
- Quality PET film designed for DTF
- Premium pigment inks (CMYK + White)
Printing Tips for Complex Designs:
- Always print white underbase for vibrant colors on dark garments.
- Use low-speed mode for higher accuracy in fine details.
- Ensure humidity control in your workspace to prevent ink bleeding.
Applying the Adhesive Powder Correctly
The adhesive powder is what bonds the printed design to the garment.
Steps:
- While the ink is still wet on the PET film, sprinkle hot-melt adhesive powder evenly.
- Shake off the excess without smudging the design.
- Cure the powder in a heat press or curing oven at the manufacturer’s recommended temperature (typically 300–320°F / 150–160°C for 2–3 minutes).
Heat Pressing for Best Results
- Temperature: 325°F (160°C)
- Pressure: Medium-Firm
- Time: 15 seconds (varies by powder and film type)
- Peel Type: Hot Peel or Cold Peel based on your film specification
Pro Tip: Always do a test press before full production to ensure colors and details transfer cleanly.
Troubleshooting Common Complex Design Issues
Issue: Loss of small details → Solution: Increase resolution and use high-quality PET film.
Issue: Colors look dull → Solution: Check white underbase coverage and printer color profiles.
Issue: Adhesive powder clumps → Solution: Store powder in a dry place and sift before application.
Scaling Your Designs for Mass Production
If you’re producing complex designs for bulk orders:
- Use gang sheets to maximize PET film usage.
- Keep consistent press settings for all garments.
- Store cured transfers flat in a dust-free environment until pressing.
Creative Tips for Complex DTF Designs
- Combine photorealistic imagery with vector elements for a hybrid style.
- Use negative space creatively to add elegance without overcrowding.
- Incorporate metallic or glitter DTF films for added visual impact.
- Experiment with oversized prints across seams and sleeves for fashion-forward apparel.
Marketing Your Complex DTF Designs
Once you’ve mastered complex DTF transfers, leverage them for business growth:
- Offer custom design services for clients who want high-detail prints.
- Showcase detailed close-up shots on social media to highlight print quality.
- Educate your customers on the durability and versatility of DTF prints.
Complex designs once meant headaches, costly setups, and limited garment options. Thanks to DTF technology, even the most intricate artwork can be transferred with stunning clarity, color depth, and durability. By following the steps above—concept creation, proper file setup, high-quality printing, and precise pressing—you’ll unlock the full potential of DTF transfers and create designs that turn heads and build brand loyalty.

